wxpython
Học wxPython – GUI Builder Tools Làm dự án nhận lương
wxPython – GUI Builder Tools
Tạo GUI đẹp mắt bằng cách mã hóa thủ công có thể rất nhàm chán. Một công cụ thiết kế GUI trực quan luôn hữu ích. Có nhiều IDE phát triển GUI nhắm mục tiêu đến wxPython. Sau đây là một số trong số chúng −
wxFormBuilder
wxDesigner
wxGlade
BoaConstructor
gui2py
wxFormBuilder là trình xây dựng GUI WYSIWYG đa nền tảng, mã nguồn mở có thể dịch thiết kế GUI wxWidget sang định dạng C+plus;+plus;, Python, PHP hoặc XML. Giới thiệu ngắn gọn về cách sử dụng wxFormBuilder được đưa ra tại đây.
Trước hết, cần tải xuống và cài đặt phiên bản mới nhất của wxFormBuilder từ Khi mở ứng dụng, một dự án mới có vùng màu xám trống ở giữa sẽ xuất hiện.
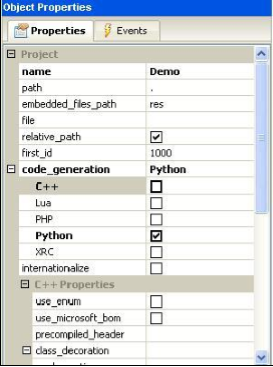
Đặt tên phù hợp cho dự án và chọn Python làm ngôn ngữ tạo mã. Thực hiện thao tác này trong cửa sổ Thuộc tính đối tượng như trong hình ảnh sau −

Then from ‘Forms’ tab of components palette, choose Frame.

Add a vertical wxBoxSizer from ‘Layouts’ tab.

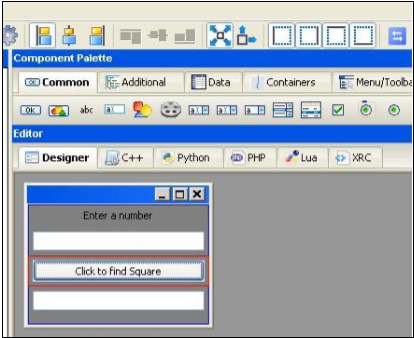
Add necessary controls in the Box with suitable captions. Here, a StaticText (label), two TextCtrl objects (text boxes) and a wxButton object are added. The frame looks like the following image −

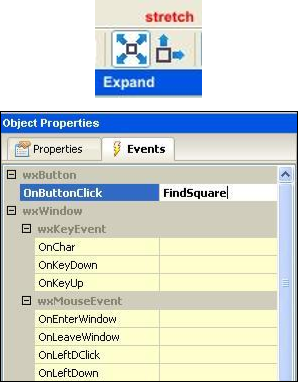
Enable Expand and Stretch on these three controls. In the object properties for wxButton object, assign a function findsquare() to OnButtonClick event.

Save the project and press F8 to generate Python code for developed GUI. Let the generated file be named as Demo.py
In the executable Python script, import demo.py and define FindSquare() function. Declare Application object and start a main event loop. Following is the executable code −
import wx

#import the newly created GUI file
import demo
class CalcFrame(demo.MyFrame1):
   def __init__(self,parent):
      demo.MyFrame1.__init__(self,parent)

   def FindSquare(self,event):
      num = int(self.m_textCtrl1.GetValue())
      self.m_textCtrl2.SetValue (str(num*num))

app = wx.App(False)
frame = CalcFrame(None)
frame.Show(True)
#start the applications
app.MainLoop()
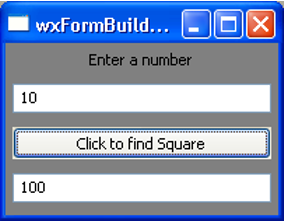
The above code produces the following output −

Vừa học vừa làm vừa nhận lương tại trung tâm Toidayhoc


